
How to Become an Author
Last updated: 2026-02-15
On This Page
Chapter Chronicles makes it easy to go from reader to published author. The process takes less than a minute, and you'll immediately get access to your Author Dashboard where you can publish stories, build your community, and track performance.
What You Get as an Author
When you become an author on Chapter Chronicles, you unlock a suite of powerful tools:
- Publish Unlimited Stories & Chapters — Use our rich text editor with formatting, chapter ordering, and draft/publish workflow
- Build Your Community — Gain followers, post to your newsfeed, and engage with readers through chapter comments
- Track Performance — Access detailed analytics on views, engagement, reader retention, and chapter performance
- Monetize Your Content — Create subscription tiers, gate premium chapters, and receive direct payouts through Stripe
Step 1: Create Your Free Account
If you don't already have an account:
- Go to app.chapterchronicles.com
- Sign up with your email address and create a password
- Check your email and verify your account
Your account is completely free — no credit card required.
Step 2: Activate Your Author Account
Once you're logged in:
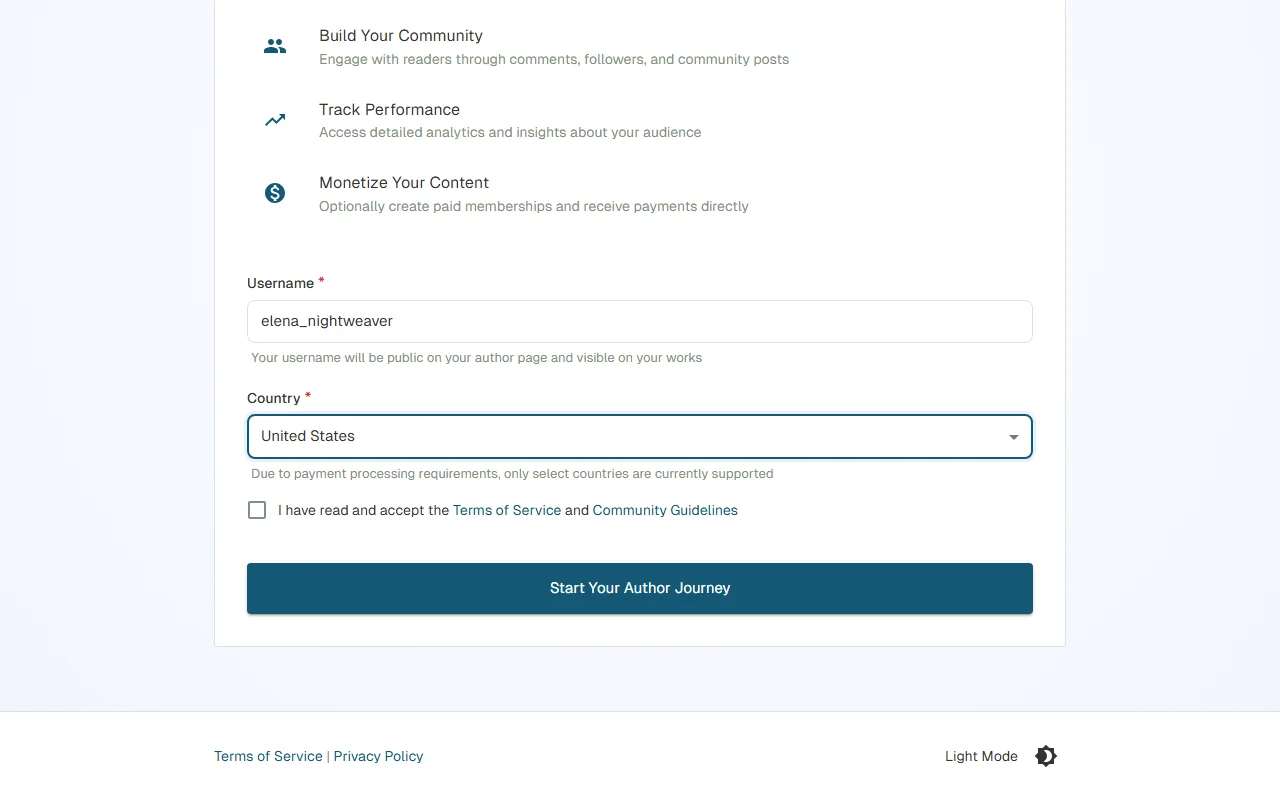
- Navigate to the Become an Author page from your account menu — there's no application or approval process, activation is instant
- Choose your author username — This becomes your public URL (e.g.,
app.chapterchronicles.com/authors/your-username), so pick something memorable - Select your country — This is required for payment processing when you're ready to monetize
- Accept the Terms of Service and Community Guidelines — Review the platform rules
- Click "Become an Author"
That's it — you're now an author on Chapter Chronicles.
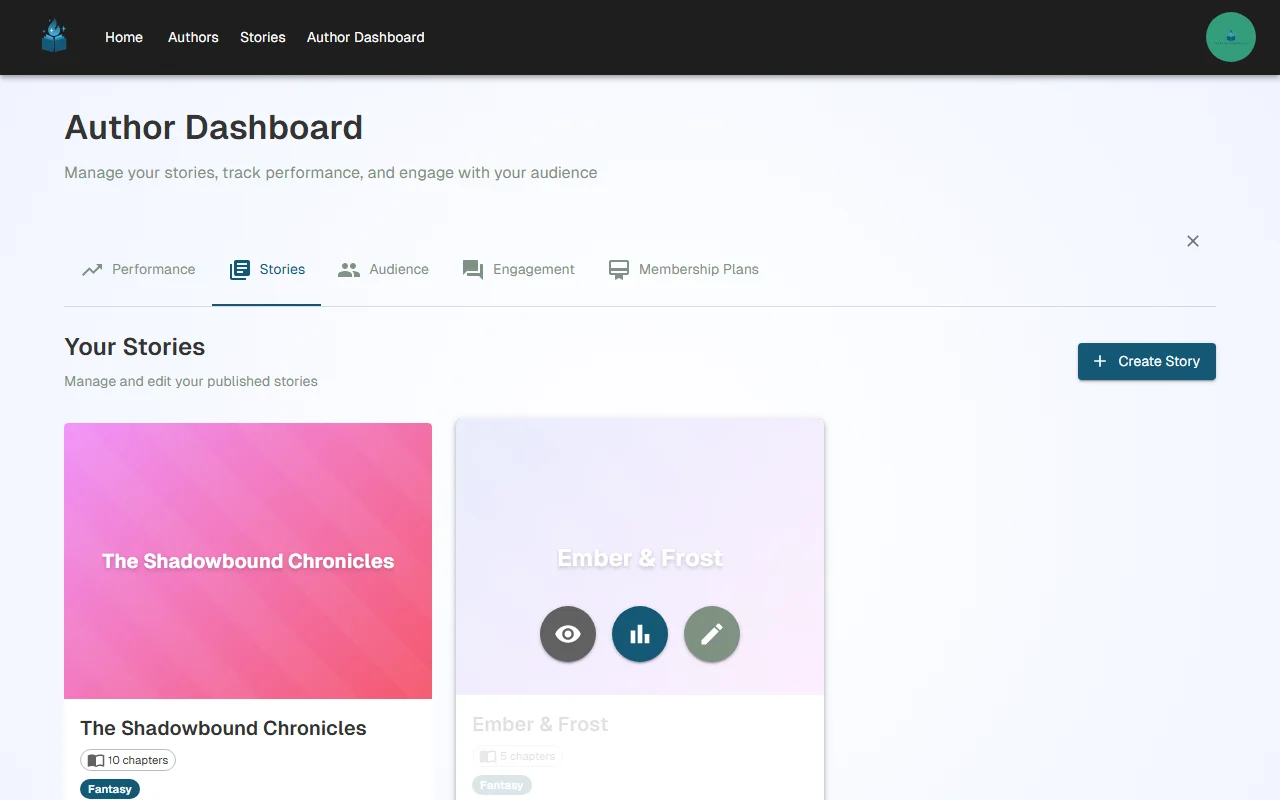
Step 3: Create Your First Story
After becoming an author, head to the Stories tab in your Author Dashboard and click "Create Story" to get started.
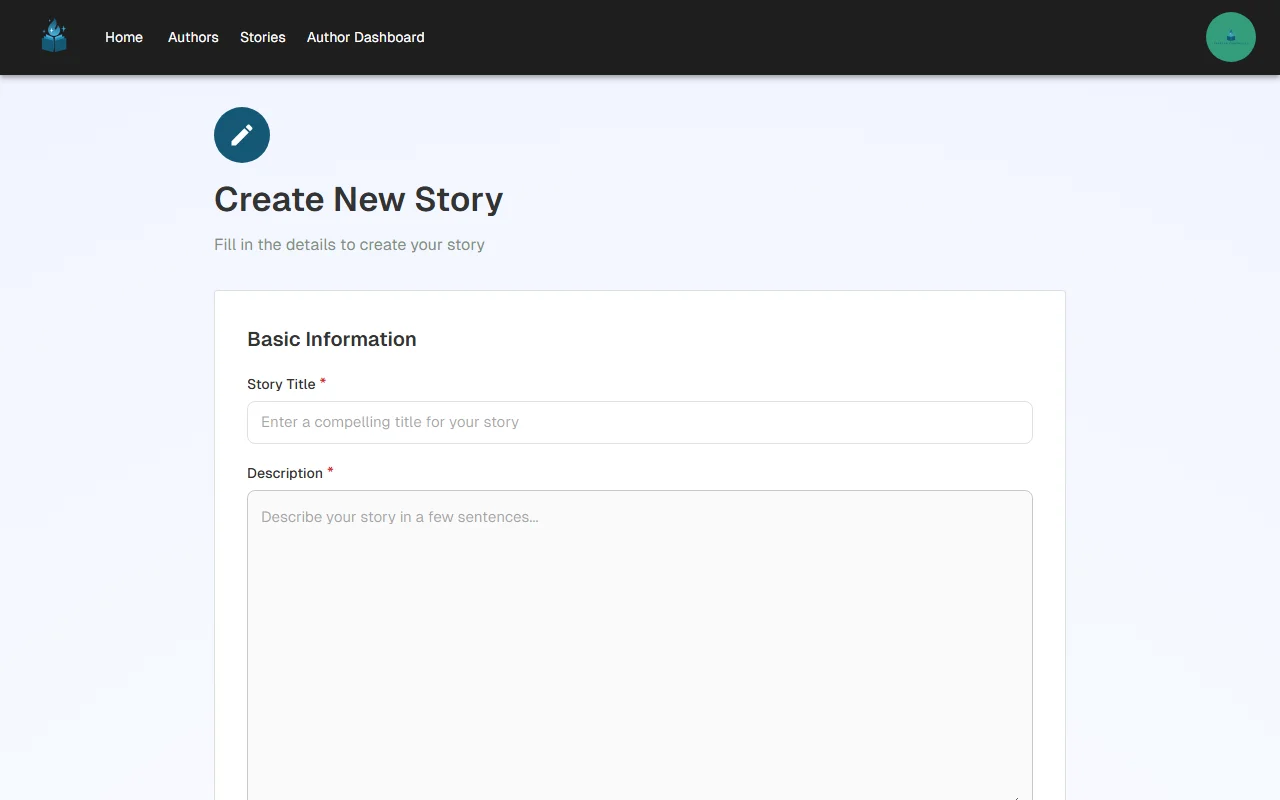
Fill in the details for your story:
- Title — The name of your story as readers will see it
- Slug — Auto-generated from your title, this becomes part of your story's URL (e.g.,
app.chapterchronicles.com/stories/your-story-slug). You can customize it if you want a shorter or different URL - Description — A compelling summary that hooks readers. This appears on your story page and in search results
- Cover Image — Upload an eye-catching cover. This is the first thing readers see when browsing stories
- Genre — Select a primary and optional secondary genre to help readers discover your story
- Content Rating — Choose the appropriate rating (General, Teen, Mature) so readers know what to expect
Click Save and your story is created. Now it's time to add chapters.
Step 4: Write Your First Chapter
From your story page, click "Add Chapter" to open the chapter editor.
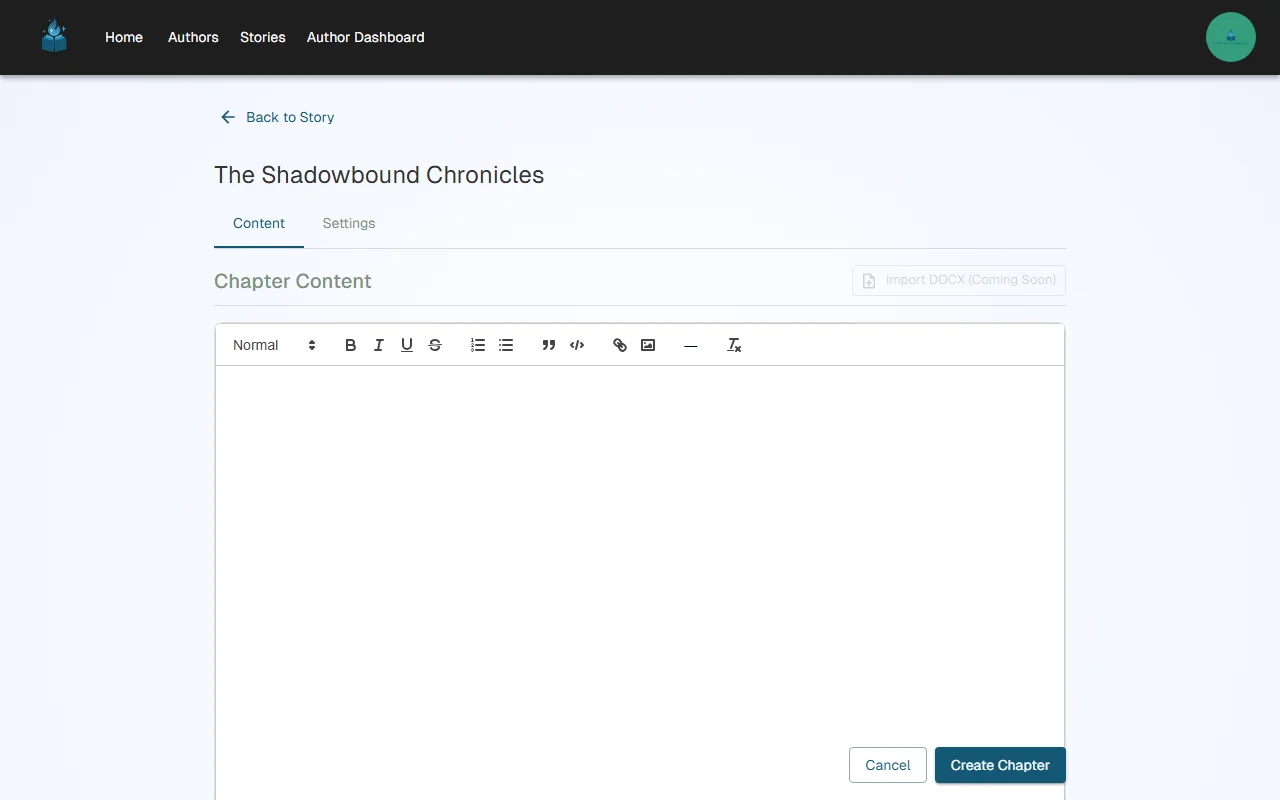
The chapter editor has two tabs:
Content Tab
This is where you write. The rich text editor supports:
- Text formatting — Bold, italic, underline, strikethrough
- Headings — Structure your chapter with heading levels
- Lists — Bulleted and numbered lists
- Links — Add hyperlinks to external resources
- Images — Embed images directly in your chapter
Settings Tab
Configure your chapter's metadata:
- Title — The chapter title displayed in your story's table of contents
- Position — The chapter's order in the story (auto-assigned, but adjustable)
- Status — Draft (only visible to you) or Published (visible to readers)
- Access Control — Set the chapter as Public (free for everyone) or gate it behind a membership tier
Tip: Start with your chapter status set to "Draft" while you write. When you're happy with it, switch to "Published" to make it live. You can always unpublish later if you need to make edits.
Step 5: Explore Your Author Dashboard
Your Author Dashboard is your command center with five tabs:
| Tab | What It Does |
|---|---|
| Performance | View revenue, subscriber counts, and earnings trends |
| Stories | Create and manage your stories and chapters |
| Audience | See your followers and customize your author profile |
| Engagement | View and respond to reader comments |
| Membership Plans | Create subscription tiers for monetization |
What's Next?
Now that you're set up as an author with your first story, here are the recommended next steps:
-
Publish some chapters — We recommend starting with at least 3 free chapters to hook readers before gating content.
-
Post to your newsfeed — Publish posts to your audience to announce new chapters and engage with readers.
-
Set up billing — When you're ready to earn money, set up Stripe Connect for payouts.
-
Create membership tiers — Design subscription plans and gate your premium chapters to paying subscribers.
-
Track your growth — Use the analytics dashboard to understand your audience and optimize your publishing strategy.
Tip: Many successful authors keep their first 3-5 chapters free to attract readers, then gate the rest behind a subscription tier. This "free preview" strategy is the most effective way to convert readers into subscribers.
Have questions or need help getting started? Reach out to us at support@chapterchronicles.com — we're here to help you succeed.
Ready to Start Publishing?
Join authors building their creative business on Chapter Chronicles. Free to start, simple pricing when you earn.
Sign Up Free